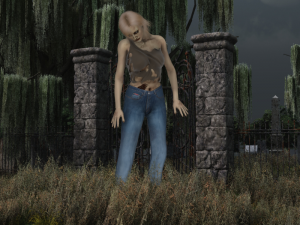
Poser has been used primarily to generate still images rather than animations. A lot of Poser users are able to produce absolutely outstanding still images that can, and have been, used as illustrations in books, magazines, and other media.
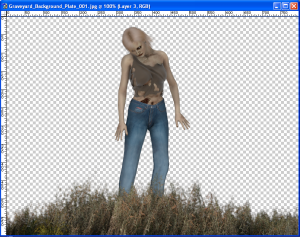
One of the techniques that has been used by Poser artists is compositing images in Photoshop. By combining still images of different elements such as backgrounds, characters, and special effects, the artists are able to create a combined or composited image that goes far beyond what could be done in camera in Poser. This tutorial describes a technique for compositing still images generated by E-on software’s Vue. By the end of this tutorial, you’ll be able to insert a character into a Vue scene and have them blend seamlessly, even to the point of having their feet nestled in the grass.
We are going to use depth maps in order to cut out the sections of the foreground that will appear in front of the character we want to insert. A depth map is simply a grayscale map that colors objects black closest to the camera and white furthest from the camera. Using this information we can insert a character as deep into the image as we want, and ensure that elements in the image that are closer to the camera to the character will appear in front of the character in the final still.
We have uploaded a set of still images and their corresponding depth maps into our downloads section, and you can use these to work your way through the tutorial.
Preliminary steps:
One of the secrets to successful compositing is to match the camera and lighting information as closely as possible. For the camera, you are going to want to adjust the camera’s focal length so that it is identical in both Poser and Vue. You are also going to want to adjust the camera angle in both applications so that it is as identical as possible. Now, for the purposes of the tutorial, the background plates that we’ve made available for download assume that the camera is level, and uses a 50 mm lens. Using this information, you can set up your camera in Poser to match the angle and focal length used to generate the background plates we’ve provided.
As far as lighting goes, we used fairly even lighting throughout Vue. The sky is cloudy and overcast, which leads to a lot of diffuse lighting in the scene. In Poser, we used an image based lighting set up for indoor lights, with the IBL being the primary light source, and with a secondary light source providing highlights and soft shadows to approximately match that in the scene. To get renders that would match reasonably closely with scenes in Vue, you would want to use image based lighting as well for any of your own renders in order to best match the rendering engine that’s used within Vue itself.
When exporting the image from Poser, we suggest using a format that includes the alpha channel, such as a PNG, PSD, or TIFF32 format file.
Now, you can of course always import models from Poser into Vue, but this is not always successful. The techniques that we’re describing in this tutorial can go beyond Poser, and allow you to insert any still image generated from any application into a still frame from Vue.
If you are planning on doing your own renders in Vue, you want to also generate a depth map when you do your scene render. Choose render options and set the render destination so it renders to disc. Click on the options button besides the render to disk setting, and place a checkmark beside the save depth map option. Assign a filename to the depth map that is different from the file name your choosing for the color picture. For our renders, we typically called the color picture a background plate, and the depth map always has the words depth map included in the filename.Then hit render, and you’re done.
Compositing:
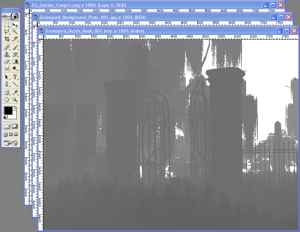
1. Load the background plate and depth map into Photoshop or your chosen image processing program.
2. Load in the character image from Poser. Just for fun, we’ve included a few Poser figures that we’ve already rendered that you can play around with, but you’re going to eventually want to render out your own character images from Poser.
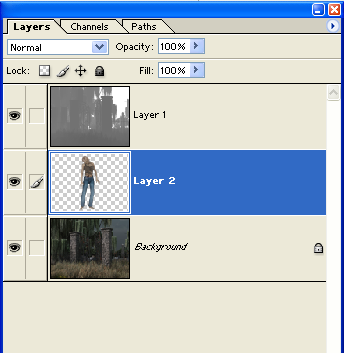
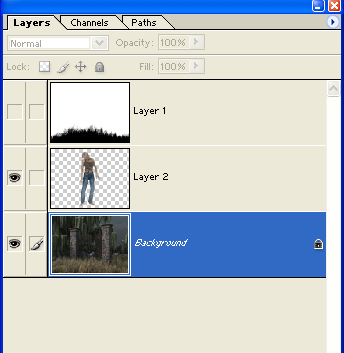
3. We’re going to use the background plate as the image onto a which all the other images are going to be composited. We’ll refer to it as a comp for the rest of this tutorial. Now, copy and paste the depth map and character image into their own separate layers in the comp.
4. Make sure that the depth map is the top layer in the comp.
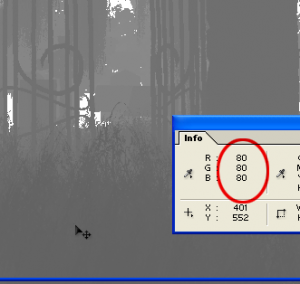
5. Pick the location where you want your character to stand, and move your cursor over that location, roughly where the characters feet would be. In Photoshop’s info window, make a note of the RGB values of that particular location. Since the depth map is a grayscale image, the red, green, and blue values of any particular pixel should all be equal to each other.
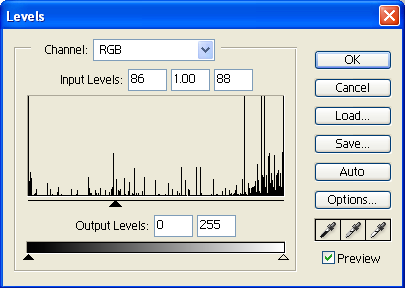
6. Using the Image> Adjustments> Levels menu command, set the input levels as follows. In the first box, input the RGB value that you noted in step 5 of this tutorial. Leave the second box at 1.0 — this is the gamma adjustment, and we don’t have to worry about it for this tutorial. In the third box, enter the value you entered in the first box plus two.
So, for example, if your RGB values in step 5 were 86, 86, 86, then you would enter 86 in the first box of the inputs levels, you would leave the second box at 1.0, and you would enter 88 in the third box. So, it would look like this:
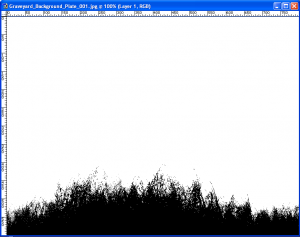
And here’s what it does to the depth map layer:
7. Once you’ve clicked on the OK button, your depth map turns black and white, with only a little bit of gray. Now, make sure that you have black selected as your foreground color, and use the Select> Color Range menu command. Choose sampled Colors as the selection method. At this point, all of the black pixels in the depth map layer should be selected.
8. Feather your selection by one pixel.
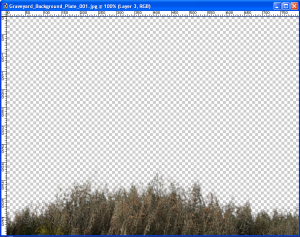
9. Click on the color background plate itself, and copy the selection.
10. Paste the selection into a layer just above the Poser figure.
11. Turn off the visibility on the depth map layer. Now, you can scale and move your Poser figure as needed to complete the image. If you want to bring your Poser figure closer or further from the camera, then you will have to reload at the depth map, and repeat steps 5 to 10 of this tutorial.
And with the visibility of the background plate layer turned on, you can see the final composit:
We hope you found this tutorial useful and that you have fun compositing using depth maps.
